Moving forward, all g-code files for printing at Seattle Makers will be created using PrusaSlicer.
Awesome reasons for the change:
-
You can test slicing (preparing prints) files at home.
-
It's free.
-
Competitive feature-wise as compared to Simplify3D.
-
If you slice on-site on your laptop, you can wirelessly send print jobs to the printers. No touching of SD cards or the public computer.
ℹ️ Note: You may need to be re-certified, but many of the lessons you've learned about our previous printers will still be relevant. Printing will be easier than ever before. If needed, Simply3D is still on the computer here at the space, but it will not be the preferred method.
First Time Setting up PrusaSlicer
PrusaSlicer Software
Download PrusaSlicer software here.
This link will take you to the Prusa Website to download the correct version for your operating system
If you're new to PrusaSlicer, check out their awesome documentation for getting started. We also cover how to use it in our 3D Printer certification course.
Setting up Printer Profiles & Settings
Our Prusa MK3s printers are stock, so using the default profiles that come with PrusaSlicer should work fine. However, we also have some non-Prusa printers that have some specialized profiles. Franklin, our large format printer, is one example. We have our profiles online for download, so you can install them for your use.
Download our custom profiles for our other printers here.
- Unzip the file
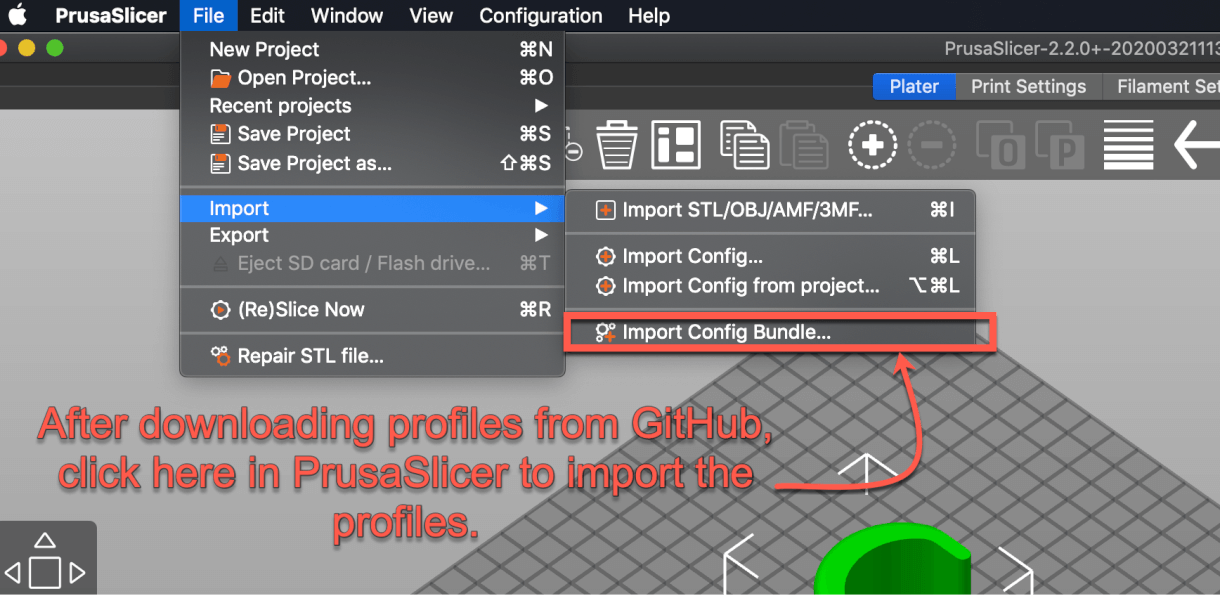
- Open PrusaSlicer and click on
File => Import => Import Config Bundle. - Select the file
SeattleMakers_config_bundle.inito import all the profiles for our printers. - If they import successfully, congratulations!
How to Print!
1. Slice Your File
To ensure that our printers continue to operate at peak efficiency please use our profiles.
Default Printer Profiles & Setting
These are the recommended starting settings for our printers.
ℹ️ Note: The rest of this sections assumes you have installed our profiles. Please see above for instructions on installing our printer profiles.
Jinja & Ada- Prusa MK3s
Print Settings: 0.20mm QUALITY
Filament: eSun PLA+
Printer: Original Prusa i3 MK3S - Jinja
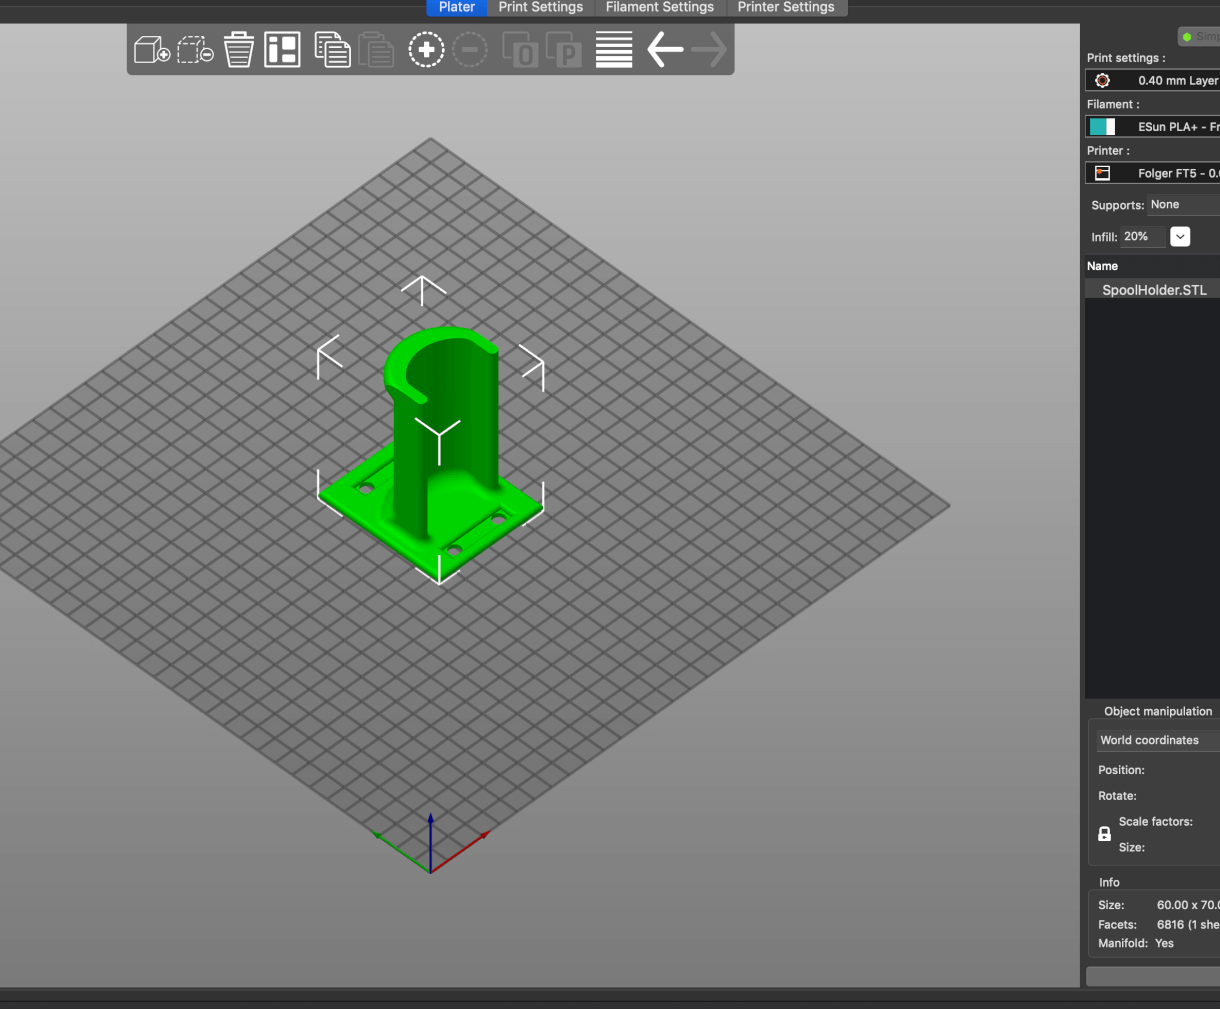
Franklin- FolgerTech FT5
Print Settings: 0.20mm Layer - Franklin
Filament: eSun PLA+ - Franklin
Printer: Folger FT5 - 0.6 Nozzle - Franklin
Sawyer - Duplicator i3 (Prusa MK3S Extruder)
Print Settings: 0.20mm SPEED - Sawyer
Filament: eSun PLA+ - Sawyer
Printer: Duplicator i3 - 0.4 Nozzle - Sawyer
After choosing the preferred settings in PrusaSlicer:
- Import your model (STL, OBJ, AMF, 3MF)
- Arrange on build plate
- Make necessary changes to layer height or other settings.
- Slice your file
- Repeat as necessary
ℹ️ Note: If you need to make any changes to your object or slicer settings after slicing, use these buttons to switch between views in order to do so.
2. Prepare The Printer
- Check the printer bed for previous print, please ask a Maketeer or the printing member if a print is complete to remove it from the bed. Please don't be responsible for breaking someone elses' print.
- Clean/Prepare the bed
- Ensure the bed is clear of debris
- Wipe the bed down with the microfiber cloth and glass cleaner/isopropyl alcohol
- Ensure filament is loaded and is the correct color
- To Un-Load Filament
- Using the wheel on the printer, navigate to "Un-Load Filament"
- It will ask for filament type, choose PLA
- Wait for the printer to heat up.
- Press the Button to unload (Franklin will unload automatically when it reaches temp)
- Remove roll carefully, ensuring it doesn't become unwound.
- Clip off the very end of the filament to remove the blob.
- To Load Filament
- Place roll of filament on printer
- Clip off the very end of the filament is there is a blob.
- Insert filament into extruder head
- For Prusa
- It will detect there is filament.
- For Franklin
- Using the wheel on the printer, navigate to "Load Filament"
- It will ask for filament type, choose PLA
- Wait for the printer to heat up.
- Press the Button to load (Franklin will load automatically when it reaches temp)
- If filament is flowing correctly
- For Prusa: Extruding Correctly? Yes
- For Franklin: Continue Purge? No
- Remove extruded filament from nozzle.
- To Un-Load Filament
3. Send G-Code To Printer (Start Printer)
No longer will you have to transfer your files to an SD card, and then manually insert the card into the printer. Using a raspberry pi and a program called OctoPrint, we now can send our G-Code directly from the slicer or web interface to the printer.
ℹ️ Note: If you are having trouble with an Octoprint Interface, please ask a Maketeer. SD cards can be used as a backup, but please defer to them to make that determination.
There are two ways to send your print.
Directly from PrusaSlice
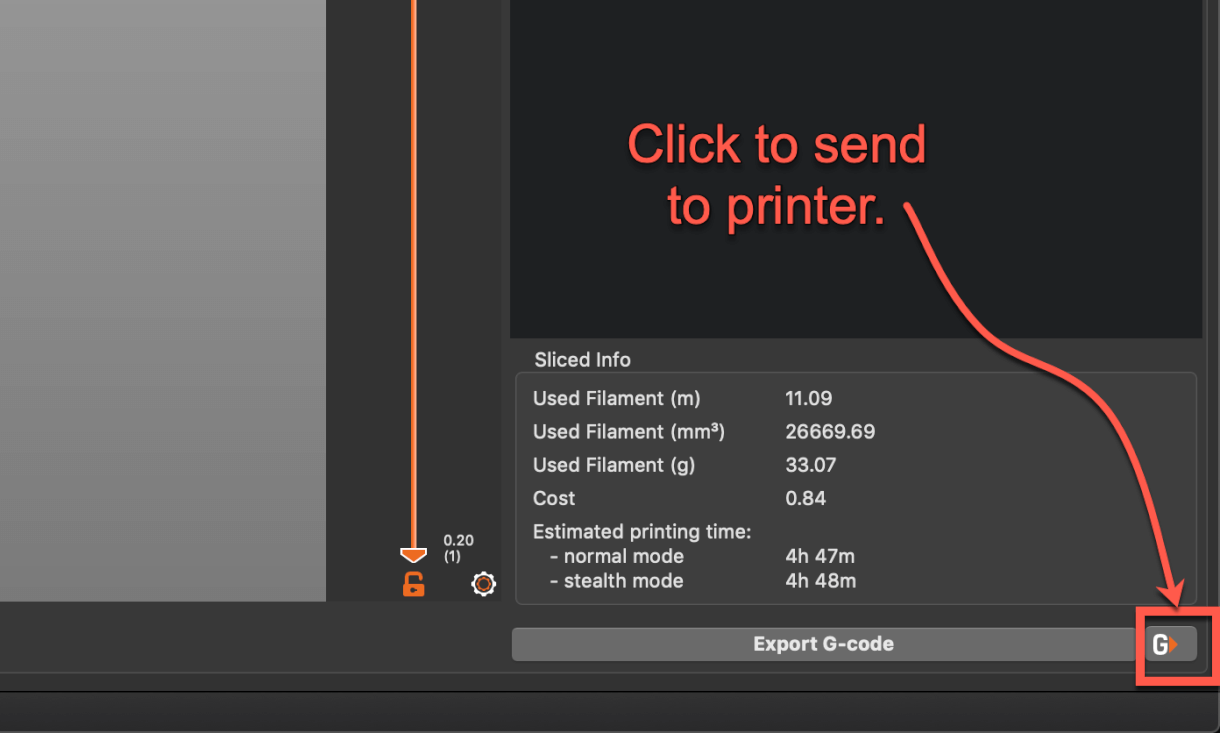
This requires you to install an API Key in PrusaSlicer. Please contact Jeff on Slack (@Jeff) to get the API key. This allows you to send files to OctoPrint and start your print without using the web browser. After you've finished slicing:
- Double check you have the correct printer.
- Click the tiny button in the lower right corner "G>."
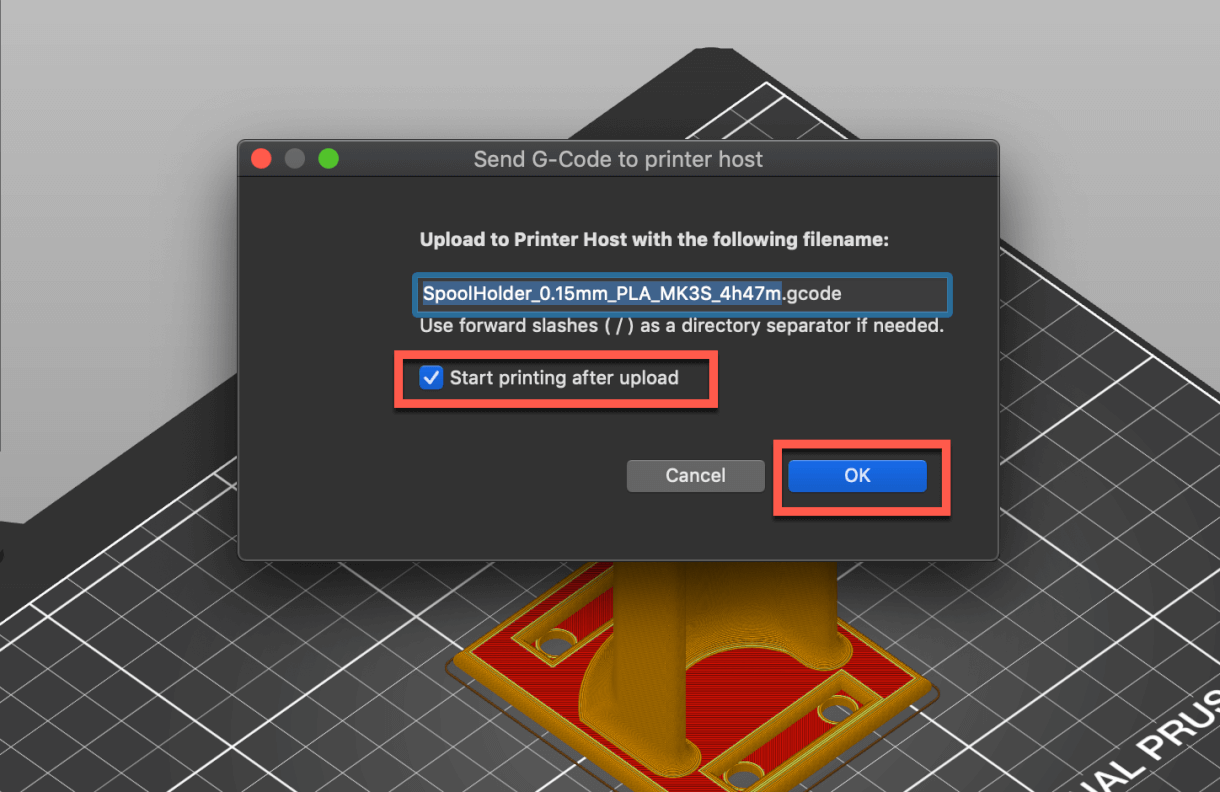
- If desired, check "Start Printing after upload."
- Click "OK."
Upload via web browser (When on-site)
After you've finished slicing:
- Export your sliced file to the desktop.
- Ensure you're on Seattle Makers Wifi.
- Open a web browser and travel to Octoprint page.
- Convention for webpage is http://octopi{name of printer}.local/ (example: http://octopifranklin.local/ allows you to get to Printer "Franklin")
- Login to OctoPrint (case sensitive).
- Login: member
- Pass: letsprint
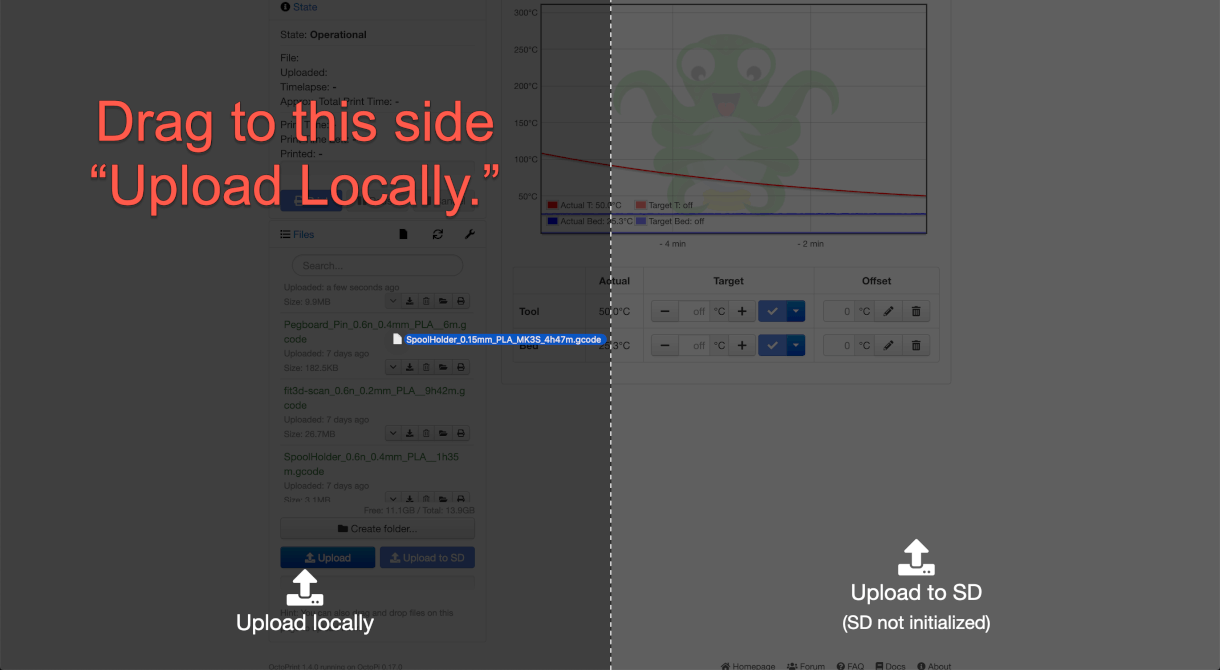
- Drag your file onto the OctoPrint web page. The page will change while dragging, and aim for the left side where it says "Upload Locally."
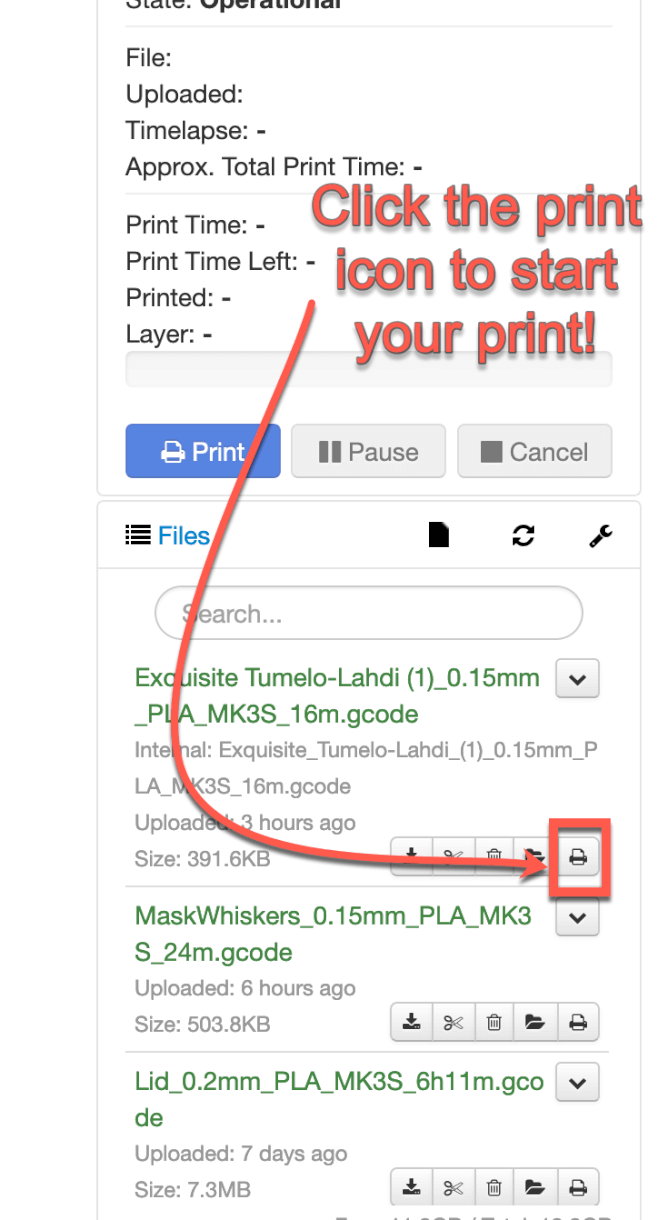
- Check the name to make sure it's your file, and click the print icon
on your Print!
- If it's helpful, you can click the small wrench to change to "sort by upload date."
How to Install the OctoPrint API'
(Coming Soon)